Hello Crafters! A week ago today, my Mom and I attended the
Stamp and Scrapbook Expo. I look forward to this show because there are lots of great vendors and the classes are fantastic. I wanted to do a little review/recap of the event along with sharing my haul. So let's jump right in!
Day One - Friday, May 5, 2017
I received a wonderful surprise from my Mom for the Expo. She had taken my Owl Be Crafty logo and had it embroidered onto polos! I can't believe I have official shirts now! So fun!
Anywho, we started Day 1 off with a early morning class taught by
Krazy Kreations called "Copic - Intro to Coloring." My mom is just starting out learning to color with Copics so we chose this class for her so that she could get some good basic tips. I share what I have learned with her but it's always great to get more tips and tricks from experts.
Here's a peek at what we worked on during class:
After class we had some time to shop and grab some lunch before our next workshop which was by
Technique Tuesday (taught by
Nicole Peterson) called "1, 2, 3...Let's Add Some Interactivity." I was pretty excited about this class because I love to make my cards interactive and I'm always looking for new ways to surprise the card recipient.
For this class we got to play around with some new products from
Technique Tuesday's line of Animal House stamps. These are the cutest stamps and they have some of the punniest sentiments. I later found out that the line is also a monthly subscription. I decided to give it a try so I'll be sharing more of their stamps in the future.
We learned 5 different interactive techniques during class including slider, spinner, pull tab, pop-up and wobbler. I've made most of these cards before but I enjoyed learning a couple new tips and tricks.
First, if you don't have an action wobbler you can make your own using a piece of wire. You wrap it around a pencil to form a coiled spring and then you can attach it to the card and the image. The owl card below is an example of that. Genius!
We also learned how to make a custom pop up card by making just a few little folds on the inside. No fancy dies or even cutting. You can see below where the little foxes were popped up on the corners. Very easy and fun!
Here's a snapshot of the cards we assembled during class. I still need to add a few sentiments and embellishments but they are almost good to go. Definitely a super unique and fun class!
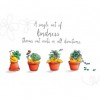
Our final session of Day 1 was the Latest and Greatest Card Swap. This is a workshop where you make 16 cards in advance based on the given theme. You then get to swap with the other participants in class so that you walk away with 15 new cards. The 16th card is placed on display and the group votes on the "Most Appreciated Card."
I participated in the swap for the first time last year and I was so nervous! It's scary putting your work out there for others to judge. It was a great experience though and this year I knew more of what to expect. My Mom on the other hand was definitely nervous since it was her first time. I assured her it would be fun and once in there with other crafters she would see it was a supportive not competitive group of ladies.
For our session the theme was to use the colors purple & yellow OR a "Get Well" or "Thinking of You" card. Here's the cards we made for the swap. I love seeing these side by side because you see our different styles. I am definitely more of a cutesy, clean and modern style and she is totally feminine and shabby chic! Her cards are always so beautiful and delicate looking. I also love her attention to detail with the matching stamp on the envelope.
We were able to get some pretty neat cards from the other swappers. It's cool getting to see other styles and be inspired by new techniques. There were more than 15 swappers in the workshop so I couldn't get every card. Below are the cards I was able to grab. I especially love the little chicken soup card. Such a cute idea with the foil spoon.
Day Two - Saturday, May 6, 2017
Day 2 started out really early because we had to line up to receive our golden tickets. These were only given out between 8:00-9:00AM and enabled you to enter into VIP giveaways from some of the Expo vendors. There were some awesome packages available. Unfortuanely, we didn't win but it was still fun finally getting our golden tickets! (I always think about Charlie and the Chocolate Factory!)

Our first class on Day 2 was by
Heartfelt Creations called Delicate Vellum Florals. I'm not familiar with Heartfelt Creations but learned quickly they have quite the following. Their products are very different from my go to style but it was neat getting to try something new. I was looking forward to learning more tips on working with vellum and this class did not disappoint. We we taught how to create dimension by using a rounded stylus to roll leaves and flowers on a foam mat. So cool! You can do this not only with vellum but cardstock as well. We also got to work with Prills. I had never heard of these but they are tiny round pearl accents that can glued in the center of flowers for a super cool look. I will definitely be using some of these techniques in the future.
Here's a look at what we made during the class:
Our final workshop of the weekend was from
Bee Creative called Watercolor Basics. I love to watercolor and I'm always looking for new mediums to use. My Mom doesn't have that much experience with watercoloring so she was looking forward to learning all sorts of new options for coloring. Our facilitator was the fabulous Karen Bremer. I took a class from her last year and I love her style of teaching. She's funny, laid back and provides the best tricks for crafting.
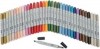
In this session we got to play around with Spectrum Noir Aqua markers, Spectrum Noir AquaBlend pencils, Spectrum Noir Sparkle Pens, Gansai Tambi paint pallette, and Tim Holtz Distress crayons. I was excited because I had never used the Aqua markers or AquaBlend pencils before. The markers were pretty neat because they had a super fine tip on one end and a brush nib on the other. Personally I like my Tombow's better, but these are definitely a better price point. I really liked the AquaBlend pencils. They were super easy to blend and gave me the best results. I own a full set of the Derwernt Inktense watercolor pencils and these are just as good. Again, a better price point too.
I purchased some of the Tim Holtz Distress crayons when they first came out but just couldn't seem to figure out the best way to use them. I was hoping to fall in love with them during this class and maybe learn how to better use them in my crafting. Unfortunately, I still don't think I'll use them. I love all of the other Distress products especially the Oxide Inks (obsessed!!) but these crayons just don't seem to do it for me. Oh well, I tried!
As for the other two products we used (Gansai Tambi palette and Spectrum Noir Sparkle pens), I own them and love them. The Gansai Tambi palette is so smooth and rich. I also love the gold and pearlized paints for splatter techniques. Definitely worth the cost to have this in your supplies. As for the sparkle pens, if you follow my blog you'll know I can't resist using the clear sparkle pen on almost every card. They provide the best shimmer. Karen showed us how to use these pens with water so create an awesome shimmer effect. I'll definitely try this in the future.
Here's a peek at the different mediums we played with along with the large floral stamp we got to take home. This will be a great stamp to play around with using the techniques we learned.
I feel like I learned something new in every workshop we took. It's my favorite part of the Expo. I would definitely recommend taking a class or two if you attend one. It adds to the overall experience.
My Haul
Of course I couldn't leave out what I purchased! Here's a quick look at my haul:
Because we took classes we did receive some great coupons and freebies from the vendors. Just another perk of the workshops. I spent quite a bit on some Hero Arts stamps & dies from the
Bee Creative booth. Hero Arts recently released some sea and ocean themed stamps and I was happy to get my hands on them. I was also able to pick up some MFT and Echo Park dies from the
Nicole Peterson booth. She had taught our Interactive class and provide a great coupon.
Below I have tried to link to all of the products I picked up just in case you're interested in more details or would like to purchase some for yourself.
Overall our experience at the Expo this year was fantastic! There's nothing like spending time with my favorite person and doing our favorite activity. It was a nice early Mother's Day extravaganza! I can not wait until 2018 to do it all over again. I think we successfully conquered the Expo!
Until next time carfters! Have a great weekend!