Where to Find Owl Be Crafty:

Wednesday, August 31, 2016

August Guest Designer for Stampingbella - Week 5 & Wonderful News!

Hello Crafters! This is my last "Wonderful Wednesdays With" blog post for Stamping Bella but it's NOT my last post for them! I was asked to become an official BELLA and member of their design team! Woo hoo! So excited to be joining this fabulous group of ladies and I'm looking forward to getting to know them and share many more crafty creations! 


So I saved my favorite for last. FAITH the FAIRY was the first Stamping Bella stamp I ever purchased and I have colored her many times over. I think this version might be my favorite. That could be because green is my favorite color or because this card is so sparkly I need sunglasses to look at it!


I started by stamping Faith onto Copic friendly paper with Simon Says Stamp Intense Black Ink. This is my favorite Copic friendly ink to use. I grabbed a bunch of Copics in greens and blues and got to work blending a bit of an ombre from the blue to green. After the main layers and shading were down, I used some Copic Spica glitter pens and dotted them all over her dress. It's hard to see in the photos but in real life it looks like tons of rhinestones cover her dress. I also used a white gel pen to add a few more dots and "sparkles" so it would look like the light was hitting them. This really adds some dimension to the dress. The finishing touches I added were some Icicle Stickles to the ruffles of her dress along with some Spectrum Noir clear sparkle and Glossy Accents to her crown, shoes and scepter. Here's a look at the colors I used and some of the tiny details:


Once Faith was complete, I grabbed a fancy edge die and die cut just one side of paper. I then added some fun green glitter paper to the card base and adhered the white piece with Faith on top. I love  the sentiment that comes with the stamp but I just couldn't seem to get it to work in the space I had. I decided to go with a sassy sentiment die which I cut out of two colors of foil paper. I glued them slightly offset so that the back one looked like a shadow and helped the sentiment stand out from the busy background. So I couldn't help myself and went a little crazy with the sequins! I chose a bunch of different greens, blues and clear iridescent ones to match her attire. Hey, less isn't more in the case of a glittery fairy! Here's a better close up of the sparkle & shine:


As I mentioned, I love the sentiment that comes with the stamp so I had to use it on the inside. I stamped the Faith image in some light green ink (a technique I learned from Amy R. I just love how she used to finish the inside of her cards this way!) and then heat embossed the sentiment in silver. 


I really have enjoyed guesting this month at Stamping Bella. It's been an incredible opportunity that turned into an even more incredible opportunity! Be sure to keep checking out the Stampingbella Blog. Remember they have some great features such as Bellarific Fridays which is a weekly challenge in which you can be entered into a monthly drawing to win some Bella Bucks! Click below for more details.


Hope you all have a wonderful Wednesday and I'll see you again soon!

Supplies Used:

Stamping Bella Holiday Release Preview - Santa's Speedy Delivery

Hello Crafters! I have one last sneak peek for the new Stamping Bella Holiday Release! Remember all of the new products will be available for purchase on Saturday, September 3rd at the Stamping Bella shop. There are tons of holiday ones including this precious stamp called "Santa's Speedy Delivery." These new stamps have really gotten me into the Christmas spirit!


To begin, I colored the image with Copics and then fussy cut it out leaving a small white border around the entire image. I then added some details to Santa's trim using Crystal Stickles. I also grabbed my white gel pen to add polka dots to the little present he was carrying. Here are the Copics I chose to use for the image:


Next up, I wanted to create a winter scene and have Santa skating on a lake. To do that, I grabbed white cardstock and drew out some little hills. I then carefully cut out the hills and added a line of Stickles to the top of each one to represent sparkling snow. For the "lake" portion, I used a piece of iridescent foil paper which really looked like a lake of ice, especially when the light hit it. I lined up where my hills needed to go and then adhered this foil paper in between them. I grabbed a piece of patterned cardstock which looked like falling snow and adhered that for the sky. All of this was then adhered to my card base. Next it was time to add Santa to the scene. I popped him up using some foam tape. 

For the sentiment, I wanted to have it on the sky piece but it just wasn't standing out enough. So I stamped it on a piece of vellum and ran it through my Xyron sticker maker. This ensures that you won't see the adhesive through the vellum since the entire piece is covered in adhesive. I then added a few sparkly while enamel dots to help highlight the sentiment. I felt like I need one last embellishment, so I grabbed some bakers twine and wrapped it a couple times around the bottom of the card. This really helped balance the color of the sky and completed the design. Here's a close up of some of the little details:


Be sure to check out the Stamping Bella blog everyday this week for more sneak peeks leading up to the big release on Saturday, September 3rd! I'll be back on Wednesday with another fun sneak peek for you!

 Stamping Bella Shop

Supplies Used:


Monday, August 29, 2016

Stamping Bella Holiday Release Preview - Meowy Christmas

Hello Crafters! Today I have another sneak peek of the Stamping Bella Holiday Release! This one is called "Meowy Christmas" and it features three very curious kitties who are helping to deck the halls! You'll have to wait until Saturday, September 3rd to purchase this stamp along with all of the other fabulous new stamps! I already have a very long wish list!


I colored the cute little scene using my Copics and some Copic friendly paper. Once I had finished coloring,  I fussy cut around the cats from the ground up, leaving the bottom half of the scene. Here's the colors I used to bring these little kitties to life!


I wanted to make the ornaments stand out a bit more so I grabbed some Stickles in coordinating colors and just applied them to the darkest area of the ornament. Before those were complete dry, I covered the ornament in Glossy Accents. I love this affect because the two mediums somewhat combine and look really cool in person. So hard to capture in pictures!

For the background, I chose some pattern paper and adhered it to the back of the colored piece. I then grabbed a stitched rectangle die and ran the whole piece through together so that there was a seamless look to it. I then mounted that onto another piece of patterned paper that coordinated well with the scene. All of that was then adhered onto my white card base. 

For the sentiment, I used a fun banner die to make it stand out. I adhrered that down with both a tape runner and some dimensionals. To finish off the card, I grabbed more Stickles and added them to the bits of ribbons on the ground. I also used some gold metallic thread to make some little bows for the tops of the ornaments. At that really completed the design. Here's a close up of some of the details:


Be sure to check out the Stamping Bella blog everyday this week for more sneak peeks leading up to the big release on Saturday, September 3rd! I'll be back on Wednesday with another fun sneak peek for you!

 Stamping Bella Shop

Supplies Used:

Sunday, August 28, 2016

Stamping Bella Holiday Release Preview - Gingerbread Chicks

Hello Crafters! I'm so excited to be able to share a little sneak peek the new Stamping Bella Holiday Release! This stamp along with a bunch of other adorable ones will be available for purchase on Saturday, September 3rd at the Stamping Bella shop. I had the pleasure of using the new "Gingerbread Chicks" stamp. I just love the chick stamp line and these are no exception! 


Aren't they just the cutest? They are ready to bake some yummy cookies or gingerbread men. I decided to go with non-traditional Christmas colors for this card. I was inspired by a holiday paper pack from Crate Paper called Snow Day. I colored the little chicks with my Copic markers on some Copic friendly paper. I then fussy cut each image leaving a small white border. Here's a close up of the Copic colors I used.:


 I used a die to create the three little windows in the patterned paper. I then selected a sentiment from another Stamping Bella set and stamped it on a piece of coordinating cardstock. I wrapped it around the patterned paper and used some tape to secure it. I added foam tape to the entire piece so that the windows would be popped up from the card base. Once that was secure, I put some dimensionals on the backs of the chicks and arranged them in the the windows allowing some parts to hang out just a bit for some added interest. To finish off the card, I grabbed some tiny enamel dots and added some into each window. I also used a bit of glossy accents on the chicks' beaks and some stickles to their party hats. Here's a close up of some of the details:


Be sure to check out the Stamping Bella blog everyday this week for more sneak peeks leading up to the big release on Saturday, September 3rd! I'll be back tomorrow with another sneak peek for you!

 Stamping Bella Shop

Supplies Used:

Friday, August 26, 2016

Summer Popsicle Card

Happy Friday Crafters! It's been a long week and I'm really looking forward to some R&R this weekend. For this card, I was inspired by the Paper Players challenge to do "Something Sweet." These adorable little popsicle stamps have been sitting in my "to use" pile for a few weeks and this was the perfect opportunity to use them. 


I began my card by grabbing some of my favorite bright ink pads. I stamped each of the popsicle designs in a different color. I then used a Copic marker in a slightly darker shade to give each pop a little bit of shadow. Each pop was then die cut using the corresponding die. For the background piece, I ink blended some Salty Ocean distress ink to give them a nice light blue background. I then layered the pops to my liking and adhered the back ones flat while popping up the two front ones some dimensionals. I had this super cute summer paper pad and choose a piece that incorporated all of the popsicle colors. Plus I love that it's a bunch of summer-time words! I decided it needed a little mat so I chose a bright yellow cardstock to put behind it. After adhering all of the papers to the card base, I grabbed some sparkling clear sequins and some Stickles because I always need a little bling! That really finished my design. I love how this card really captured summer!

I'm entering it into the Paper Players Something Sweet challenge. There are lots of yummy cards on their blog so be sure to go check them out below!


Have a wonderful weekend and I'll be back soon!

Supplies Used:

Wednesday, August 24, 2016

August Guest Designer for Stampingbella - Week 4

Hello Crafters! Today I'm featuring one of my favorite Stampingbella stamps called Uptown Girl FARRAH Loves FLASHDANCE. I was a child of the 80's so this stamp takes me back to a time where neon, teased hair, and leg warmers ruled!


In order to capture the bright neon colors, I pulled out my Zig Clear Color Real Brush markers. These markers stay saturated and bright even after adding water to them. I stamped the image on Bristol cardstock using Ranger archival ink. I find I have the best luck with the Zigs using this combination. Bristol is not watercolor paper so you have to be careful how wet you get it. In this case, I used very little water and did a lot of my blending on my palette first. Once the image was dry, I fussy cut her out leaving a small white border around it. I added a few little details such as glossy accents and some Stickles. Here is a close up and the colors I used.


I thought a shaker card would be a neat background for Miss Farrah. I started by die cutting a fun shape from a piece of patterned paper. I then adhered a piece of acetate to the back to complete the window portion. I grabbed some foam tape and lined the window portion creating a areato contain my shaker bits. I choose three different colors of neon sequins along with some clear ones.

For the back of the shaker, I pick this really neat iridescent foil paper. I had picked it up at Michael's last holiday season and I've been hoarding it ever since! I hope I can find some more this year. I wanted to add something to the inside of the shaker since it took up the majority of the card. I decided to die cut some letters and lined them up on the iridescent paper so when I attached it they would be at the top of the shaker shape. Once my shaker component was complete, I adhered Farrah to the shaker and then stuck a few neon enamel dots to finish it off. The sentiment that comes with the stamp is so like totally cute! I decided to feature it on the inside of the card and stamped Farrah one more time in a bright neon green ink.


Be sure to check out the Stampingbella Blog. Remember they have some great features such as Bellarific Fridays which is a weekly challenge in which you can be entered into a monthly drawing to win some Bella Bucks! Click below for more details.


Hope you all have a wonderful Wednesday and I'll see you again soon!

Supplies Used:

Monday, August 22, 2016

"Punny" Smoothie Card

Happy Monday! I hope everyone had a wonderful weekend. I was able to spend some much needed time in my craft room this weekend. I was searching around for current challenges and two inspired me to create this fun or should I say "pun" card!


I purchased the Lawn Fawn "So Smooth" set a while back and I was so glad I finally got to ink it up. Plus, I couldn't wait to turn that little blender into a shaker! Having been inspired by the sketch at Retro Sketches, I decided to make three pattern papers using the tiny fruit stamps in the set. These were all colored with my Copics and it took me a little longer than I anticipated, but the results were worth it! After I cut my patterned papers to the size I wanted, I choose some solid color mats to place behind them. This helped them stand out a bit and not blend too much together.

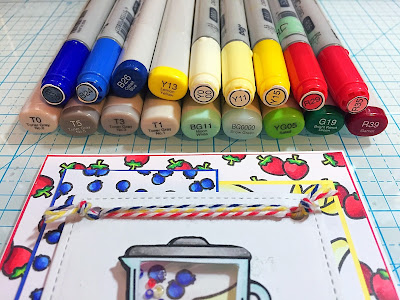
I used a Lawn Fawn stitched banner die to create the center piece that would hold the blender. I stamped the sentiment in Versafine ink and heat set it with clear embossing powder. Next, I stamped the blender image on Copic friendly paper with Simon Says Stamp Intense Black Ink and after coloring it, I used an Exacto knife to carefully cut out my shaker window. I backed it with a small piece of acetate and cut tiny strips of foam tape to create the container for the shaker bits. I lined up the blender where I wanted it on the banner and used a pencil to draw a little outline. This helped me to know where to stamp the fruit that would be visible in the shaker window. I then choose some seed beeds in yellow, blue, red and clear. I sprinkled them onto the stamped fruit and adhered my blender on top. I felt that I needed to add a bit of a scene behind my blender so I stamped up a few more fruits and adhered them behind the blender. To ground the whole scene, I used a little bit of gray Copic to draw in a shadow. Here are all of the Copics that I used:


Before popping up the banner on top of the patterned papers, I grabbed three different colors of bakers twine and looped them through the top of the banner. Instead of a bow, I knotted the ends of the twine to secure them in place. There may be a lot going on in this card but somehow it works, lol! Here's a close up of the shaker:


As I mentioned I will be entering this card into two challenges this week, Retro Sketches and Lawnscaping Challenges. Make sure to go check out all of the fabulous Design Team cards. They are really inspiring!


I hope you all have a wonderful week and I'll see you next time!

Supplies Used

Friday, August 12, 2016

Dragon Birthday Card

Happy Friday! A few months ago My Favorite Things released a unicorn stamp set that I fell in love with. This month they followed that up with an equally cute dragon set! I knew I had to get it and couldn't wait to play with it. I also picked up some of the cute new birthday candle dies and after seeing some samples of them together, decided to try my own version.


I started by stamping and coloring the little dragon image with my Copics. I added some dot detail with my white gel pen and also some glossy accents to his horns and claws. Next I decided to do a little fussy cutting and left a tiny white border around the entire image. Here are the Copics I used:


For the cake, I used a My Favorite Things cake die-namics to create this image. I picked some fun polka dot paper and a coordinating cardstock. Once it was assembled, I added Spectrum Noir clear sparkle pen all over the purple frosting. You can tell from the picture how sparkly that stuff is! I just love it! Next, I cut the flames and candles with another MFT die-namic from a yellow glitter paper and Copic friendly white paper. I added a slight blue highlight to the candles so that they popped a little bit. I also colored the wicks gray so they would look like they had been lit. 

For the background, I used my Copic airbrush system and a homemade stencil to create the clouds. I used purple and blue Copics just to make it a bit more whimsical. I adhered the dragon and all of the cake parts. I decided to pop up the flames with some dimensionals. 

The sentiment did not fit as it was so I did something that make some stampers cringe, I cut the clear stamp to make it work for me. I promise this doesn't hurt your stamp and it will fit back together perfectly. I used my MISTI to ensure the sentiment was lined up correctly and I also embossed it with clear embossing powder to give it a little bit of shine. To finish it off, I added some of my favorite sparkling clear sequins. Here's a close up of some of the details:


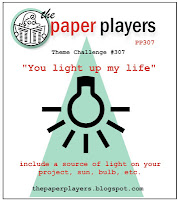
I just love these little dragons! I know this is going to become a favorite set of mine. I think a dragon/unicorn scene may be coming soon! I will be entering this card into the current Paper Players challenge which involves a source of light. I'd say those large candles would provide LOTS of light! Be sure to check out some of the other great entries below. They are always so inspiring!


http://thepaperplayers.blogspot.com/2016/08/pp307-theme-challenge-from-joanne.html

Have a wonderful weekend and I'll be back again soon!

Supplies Used:

Wednesday, August 10, 2016

August Guest Designer for Stampingbella - Week 2

Hello Crafters! I'm back guesting over at the fabulous Stamping Bella blog and this week I wanted to highlight one of my favorite times of the year, American football season! Pre-season games start this week and with that in mind, I knew I needed to use one of the new Bella version 2.0 stamps, the adorable POMPOMABELLA.


I stamped the Bella on Copic paper using a Copic friendly black ink. Before I got started on coloring, I googled images of my favorite team's cheerleaders and used a Copic multiliner pen to modify the uniform. After coloring her, I used a Spectrum Noir Sparkle pen in clear to give her outfit a little bit of shimmer. Here's the colors I used:


I knew I wanted to give her some 3-D pom poms so I used a technique my mom taught me years ago with embroidery thread and a fork. I pulled out this really neat ombre embroidery thread from my stash that I found at Michael's a few years ago. It worked really well for this project.

Here's a little step-by-step on how you can make your own pom poms:
  1. Wrap embroidery thread around the tines of a fork 20 to 50 times based on how full you would like the pom pom to be. The more times wrapped around the fuller it will be. Also, your fork size dictates how large the pom pom will be. The larger the fork the larger the pom. 
  2. Cut a piece of embroidery thread to secure the pom. I always like to make sure I have plenty of length so for these smaller poms I cut about 4 inches of thread. I'd rather have more than not enough. I thread this piece through the center tine of the fork and tied a loose knot to keep it in place.
  3. Slide the pom off of the fork and then tie a tight knot in the center to keep the pom together.
  4. Take a pair of scissors and slip the tips through the little loops on either end of the pom snipping them apart. Be careful not to pull to much to one side or the other so that the strands don't slip through the knot. This is especially true the smaller your pom pom is. 
  5. Fluff out the pom pom and use a sharp pair of scissors to snip off the uneven pieces. You can even trim the pom pom down to size if you find that it's too big for your project. 
  6. Voila! You have your very own pom-pom! Easy Peasy!
Once I had my pom poms made, I cut out the image leaving a small white border around her. This included removing the stamped pom poms so that they wouldn't show under the 3-D poms. For the background, I used a piece of football field scrapbooking paper to help set the scene. I adhered it to the card base and then positioned and adhered my Bella where I wanted her. I used a liquid glue to secure the pom poms and I drew a little shadow with gray Copics to help ground her. I cut two banners from orange and blue cardstock for the sentiment which I embossed in white. 

Once those were secure, I felt like I needed some kind of embellishment so I went looking through my stash and found these cute little white and blue stars. I wanted to have at least one orange star and since I didn't have any I just colored one of the white ones with my orange Copics. I love how easy it is to alter items you have in your stash. Here's a close up where you can see the sparkle I added to her uniform.

Be sure to check out the Stampingbella Blog. Remember they have some great features such as Bellarific Fridays which is a weekly challenge in which you can be entered into a monthly drawing to win some Bella Bucks! Click below for more details.

Hope you all have a wonderful Wednesday and I'll see you again soon!

Supplies Used:


Monday, August 8, 2016

August Guest Designer for Stampingbella - Week 1

Hello crafters! I have such exciting news! I was asked by Emily over at Stampingbella to be a "Wonderful Wednesdays With..." guest designer for the month of August. I am so honored and I’m looking forward to becoming a part of the lovely Stampingbella community! I have always loved Stampingbella stamps. The images are so sweet and are a blast to color. My favorites are the Uptown Girls and Cool Chicks. Be sure to go check out their site below:


 For my first card I knew I had to choose "Owliver Loves to Celebrate." As you all know I have an affinity for owls and I thought this would be a great card to kick off the month with! I started by coloring Owliver with my Copic markers. I used glossy accents on his glasses and also a bit of clear sparkle pen on his hat. I then used a wonky stitches die to cut out the circle.

I wanted to use something unexpected and since one of my other hobbies is baking, I grabbed a classic silver baking liner. It was definitely too big as is so I cut out a circle slightly larger than the wonky circle and then used my fringe scissors to give it a little more texture. I really love how it turned out. It just give a perfect background to my little celebrating Owliver! 


I cut out a piece of patterned paper slightly smaller than my card base and adhered the baking liner and owl to the center. I stamped and embossed the sentiment onto a piece of coordinating cardstock and used a banner die to trim it down. Once I adhered that piece I felt I needed a little more piazza so I grabbed some Doodlebug sprinkles and scattered a few around the sentiment to highlight it. 

Here's a close up of little Owliver and the Copics I used to color him:


I hope you all check out the Stampingbella blog. They have some great features such as Bellarific Fridays which is a weekly challenge in which you can be entered into a monthly drawing to win some Bella Bucks! Click here for more details. 

Hope you all have a wonderful week and I'll see you again soon!

Supplies Used: